The AMD K6-2 1998 Build
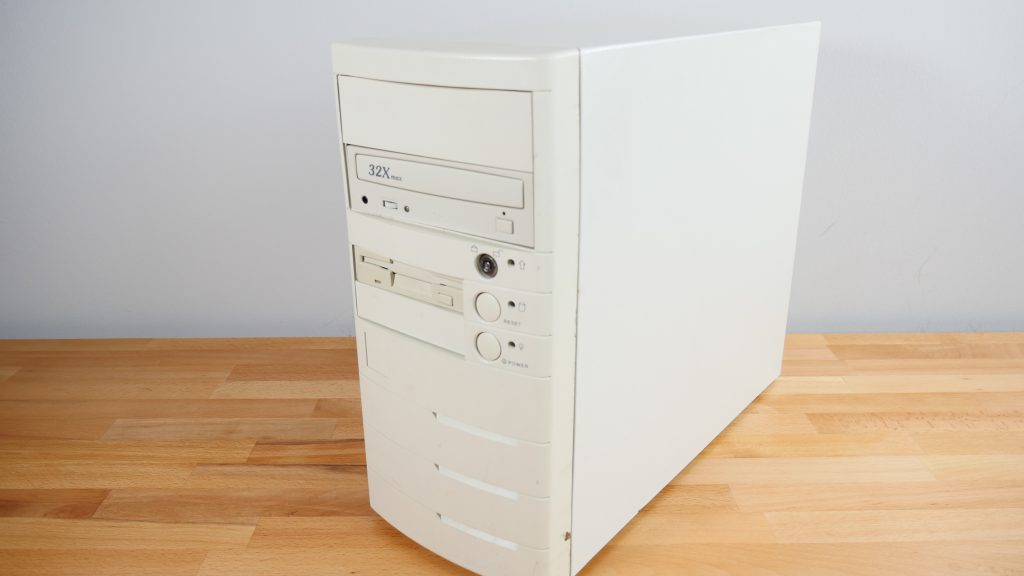
So quite a while ago from work I managed to snag a few generic towers from the mid 90s. They had lived their lives as fax and voicemail servers in a fairly clean environment. I stored them and eventually used 1 of them to build the machine featured in my first video. That would be the P3 700 Mhz machine that I frequently use for gaming, streaming and all kinds of nostalgic goodies. However this page isn’t about that computer but rather what I did with this tower.
As it came from it’s previous humble life it was specced out with Socket 7 motherboard and a K6 266 MHz (66 FSB) processor. I didn’t think too much of it and stocked it away to return to at a later time. That later time recently came up as I realized I had the parts to basically make it into a 1998 gaming machine. Let me clarify what I mean with 1998 specifically.
The parts in the machine and what would later go in would target a general rule of having been released in 1998. There are some exceptions we will cover later on but that was my general idea. Let’s go through the parts.
The motherboard is a Tekram p5t30-b4e or in this guise also referred to as an Impression TX533.

It’s a Socket 7 motherboard featuring a wide array of options. Considering the era this was made for it’s clearly designed to be sort of an upgrade path or hedged bet on standards. We have both DIMM and SIMM memory slots, PCI and ISA slots as well as support for both ATX and AT power supplies. Clearly the intent being a motherboard that could fit many different scenarios. A bus speed of 66 MHz limits the upper ranges this can go to however but that is the tradeoff of having that Socket 7 processor support.
All in all, especially considering the application I found it in, it appears to primarily target the business users. The chipset in use is the Intel 430TX. By the time we got to the later processors this board could support Intel had moved on to their new Slot 1 design but AMD decided to stay behind there and squeeze out some more life out of the socket 7. Thus the K6-2 line was devised and kept growing.

That brings us to the processor for this build. The is the AMD K6-2 300AFR/66. A 300 MHz processor operating on a 66 MHz FSB. The multiplier for our motherboard is set to 4.5x to get those 66 MHz up to the internal speed of 300. Interestingly enough the documentation I found for this motherboard does not list the K6-2 as being one of the supported processors but since it runs at the same clock and voltage as the K6 (which is supported) it seems to have taken it just fine.
The K6-2 300 seems to definitely be more targeted to the budget user in mind especially with that 66 MHz bus speed. Comparing it to a Pentium 2 of the same clock it’s quite easily outmatched in most benchmarks. In games you may not notice a ton of difference but in raw performance it’s quite behind many tests.

But most of us aren’t just staring at benchmarks all day (right?) and it’s more real world use that matters. The point I wanted to make with all of this was just to stick with a representative processor from 1998 and the K6-2 300 is spot on for that. It’s something that you had a high chance of finding in a home machine so that’s what we are using here.
We need a couple of video cards to make this gaming rig fully sing. First off to handle the 2D workload we are using what actually came in the machine. A tested, tried and true 4 MB S3 Virge DX.
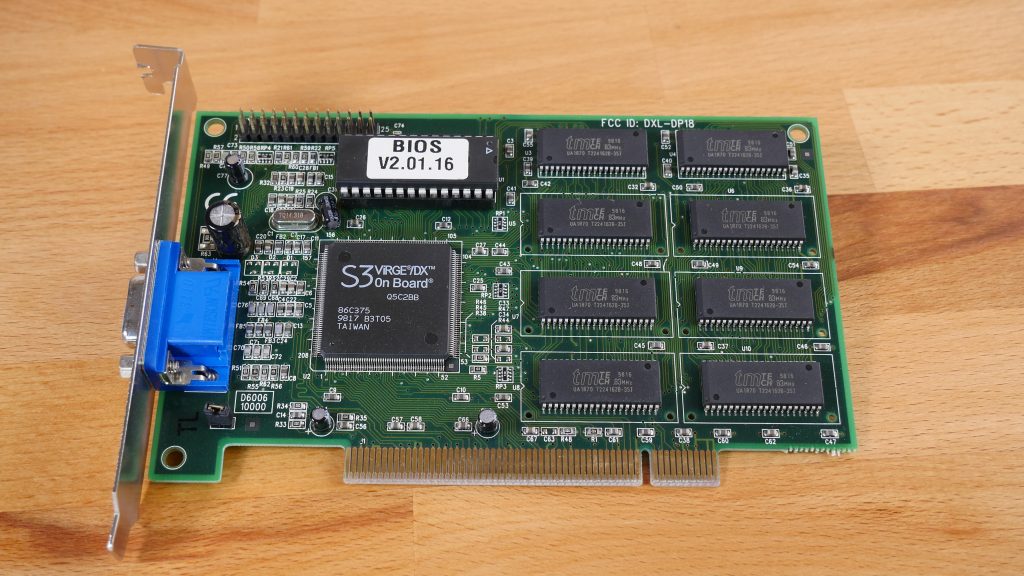
This card actually does fully feature 3D acceleration but so few games took advantage of of the S3D (clever huh?) API. There certainly were more powerful cards from S3 later on but in this format the 3D is more of an afterthought. Sure you could play some games but the list is short and considering the excellent 2D performance and compatibility this card has it will be kept in that role.
Which of course brings us to what will give this computer most of the gaming chops it needs which is a 3D Blaster Voodoo 2 8 MB, model CT6670.

The Voodoo series from 3dfx is pretty legendary at this point. Ushering in the 3D accelerated future with gusto there was nothing quite like it. While other 3D standards attempted to take over and the popular DirectX and OpenGL mostly winning the race eventually at first there was no competition. More and more developers threw their weight behind 3dfx and their Glide API making them the king of the hill. At least for a while. The Voodoo 2 card continued what the Voodoo had started and may be considered the high point for the company as a whole. If you bought a Voodoo 2 on launch you were in for a treat with a wide range of games supported and for the time quite impressive visuals. So since I had one of these cards it seemed like a perfect fit for our 1998 gaming rig. The Voodoo 2 launched in, you guessed it, 1998. I love it when a plan comes together.
When playing games sound can be just as important so I wanted to use a good sound card for this machine but yet again sticking to that 1998 timeframe. To get the broadest compatibility and also give us excellent DOS audio I ended up with a Soundblaster AWE 64 Gold model CT4390.
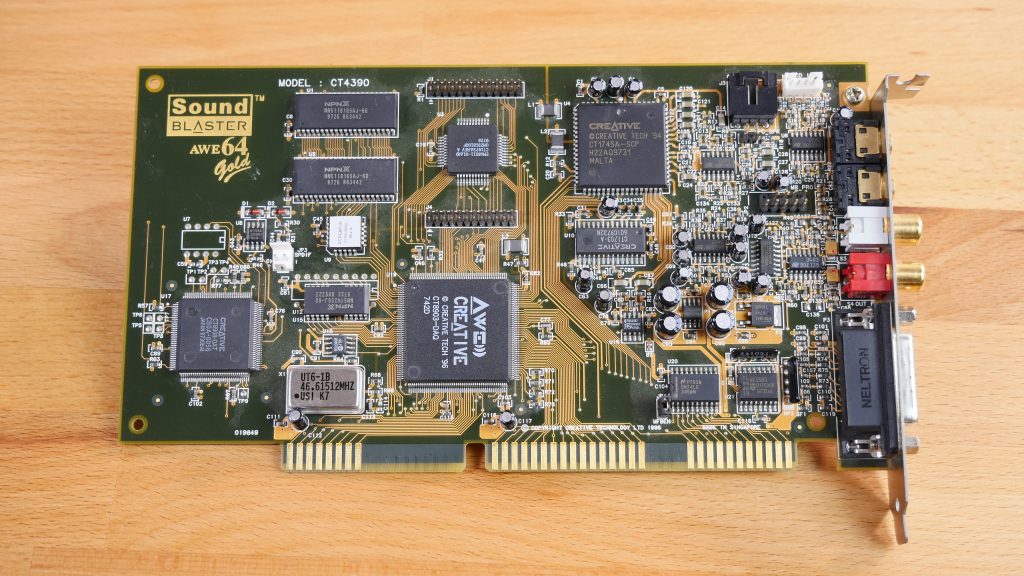
The AWE64 Gold may be one of the most compatible cards around when it comes to late DOS and early to mid 95/98 gaming. The ISA form factor allows it to easily work with DOS applications directly and having support for several of the Soundblaster standards plus OPL you won’t be wanting on that front. It may not be the best for every single scenario since it doesn’t use a true OPL3 chip as an example but rather an in house synthesized one but again that compatibility is there.
Windows audio is handled out of the box even with the retail version of Windows 98 installed on this machine and already on first boot audio was present and accounted for. The Gold part of the card stems from some upgraded components plus the RCA audio out jacks which are of course gold plated. This truly is a one and done card that supports just about everything. What it does lack are some of the more advanced 3d positional audio standards that showed up on cards later on. Such as EAX from Creative or A3D from Aureal. This computer does have room to fit another PCI sound card should we feel like running an even more complex setup to gain access to those as well.
As for storage the eternal challenge these days with retro computers are the spinning disks and their limited time left. One by one they succumb to the inevitable end result of being based on something mechanically spinning. They fail. The click, they won’t read and they just flat out stop working. Fortunately on the retro PC front we are now a bit spoiled for choice via the path of SD to IDE adapters. They were likely originally designed for industrial machinery which may still be reliant on IDE style drives or disks but serve us quite well. The idea is that your motherboard is none the wiser and just sees it as a disk like any other. Of course this allows us to use readily accessible SD or Micro SD cards as hard drives on our old computers.
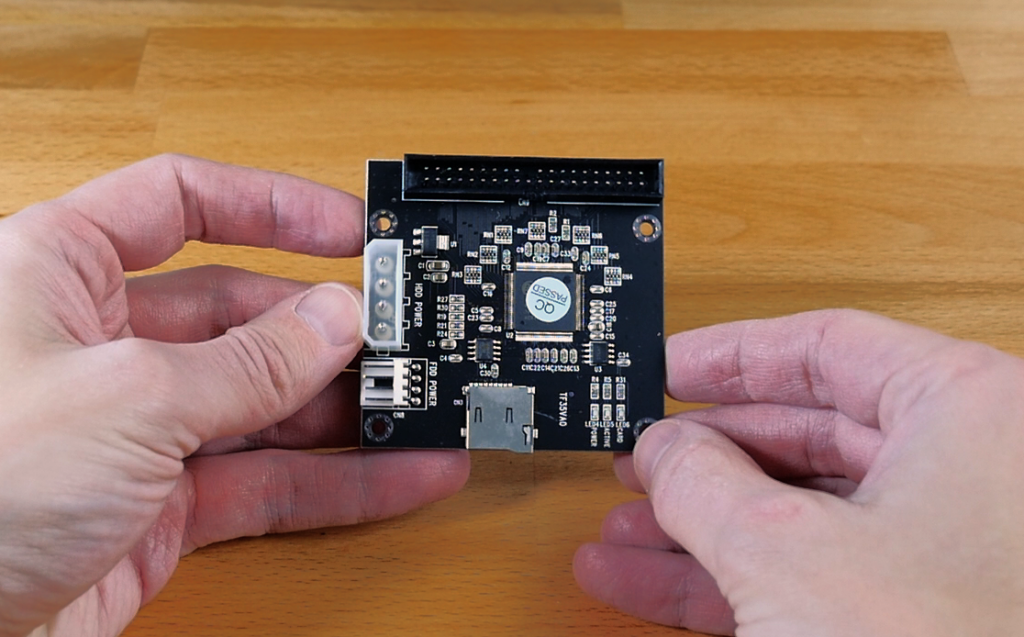
There is the concern about read/write cycles and if these SD cards will hold up to the challenge we are putting them through. My take on that however is that a) the mechanical drives are failing any way and b) SD storage is dirt cheap so if one fails you are out a few bucks plus the inconvenience of restoring the system. In my case it’s a no brainer where spinning disks fail. I prefer the disks where I can just from the nostalgia and noise but from a modern solution aspect it’s an easy choice. Being able to take the SD card and plop it into your modern machine to transfer files or even try out different OS loads with ease makes it well worth it.
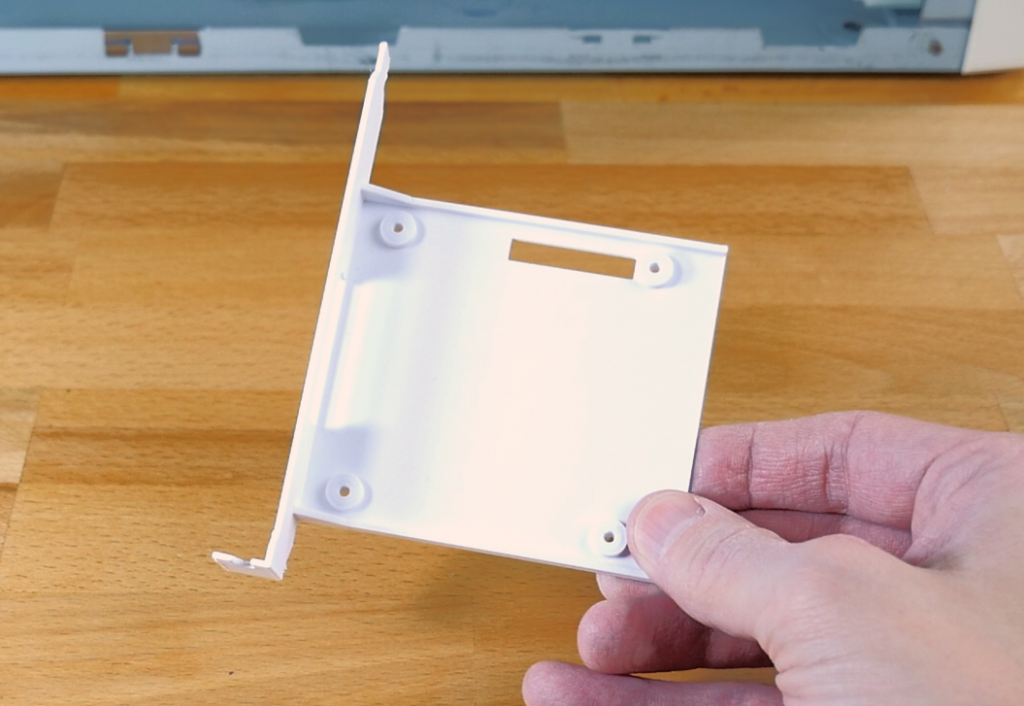
To actually mount the adapter in the computer this time I enlisted a friend with a 3D printer who was nice enough to make me a bracket. It’s not an exact fit for the adapter I have but a bit of double stick tape took care of that problem.
A really interesting thing happened with the CD-Rom drive for this machine. First off the original drive that was in there seemed fine but then I shook it a bit and it basically sounded like a loose bag of marbles. Not something I wanted to have running in my machine if I could avoid it. So I switched to a spare drive I had with about the same specs. Well that one also ended up being a bust… so 3rd time was the charm and I ended up with something a little newer than intended but still does the trick. I tell you these retro computers always have something up their sleeve.
Which speaking about the next part being the power supply that probably was the biggest bummer with this build. The machine came with an AT style power supply but during the build I managed to put red against red on the power connector which likely proved fatal to the PSU. I’ll do some real testing on it to determine that for a fact but I consider myself lucky that I didn’t fry anything in the process. Live and learn and it pays to not be sloppy with these old machines! Our upgrade instead consists of a newer ATX style power supply which leads us to the next upgraded part.
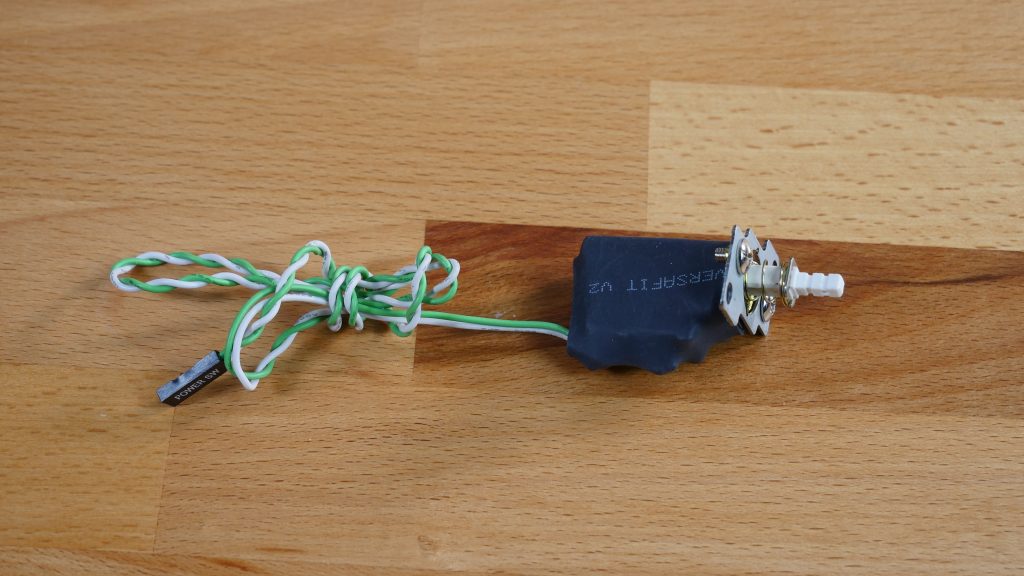
Normally an AT power supply is turned on directly meaning there is a cable that runs all the way from thee case to the PSU. That provides the mechanical breaker needed to close the circuit and turn the power supply and thus computer on. I’m sure I’m simplifying this greatly but that’s the way I understood it. An ATX power supply expects a power signal from the motherboard and the computer turns on with just that momentary button push. This particular cable bridges that gap and allows you to connect the mechanical switch of an AT style case directly to a motherboard spot to allow an ATX power supply to turn on. It works great and I found it on eBay for about 10 bucks.
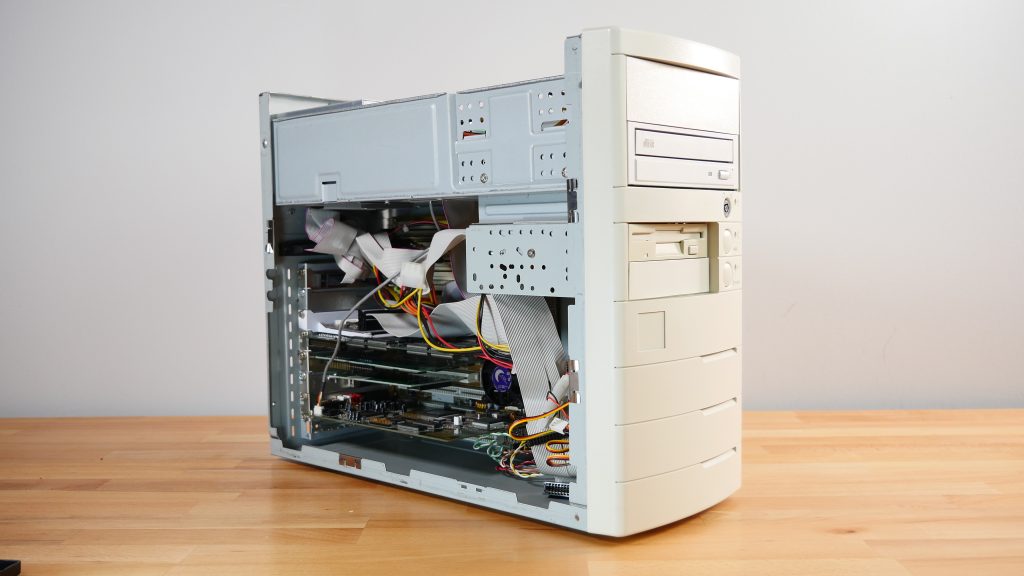
End result with everything put together I think turned out great. It’s a nice 1998 machine with what you’d expect from that era.
Final specs:
- AMD K6-2 300 AFR
- Tekram P5t3-b4e Motherboard
- 64 MB RAM
- 4 MB S3 Virge DX
- Creative Labs Voodoo 2 8 MB
- SoundBlaster AWE64 Gold
- 32 GB IDE to Micro SD Card Adapter
It was a fun machine to explore, piece together and finally use. Trying to stick to a year made it a bit more grounded compared to many other machines I have which usually are quite powerful for their task. Sure that gives you a very distinct edge as well but there’s something to be said for a more period correct machine as well.
If you’d like to see the 2 part build series as well as a livestreaming session featuring this very machine they are linked below.